
When it comes to capturing life’s most thrilling moments, SJCAM cameras have become the go-to choice for adventurers and content creators alike. With their compact size and impressive image quality, these cameras allow you to document your experiences in stunning detail. However, the true magic happens when you take your raw footage and transform it into a masterpiece through the art of editing and post-processing.
Unlocking the full potential of your SJCAM footage requires more than just pressing the record button. It involves a careful blend of creativity, technical skills, and an understanding of the post-production process. In this article, we will delve into the world of editing and post-processing, sharing invaluable tips and techniques to help you elevate your videos to new heights.
One of the key aspects of post-processing is the ability to enhance the visual appeal of your footage. By applying various adjustments and corrections, you can breathe life into your videos, making them visually captivating and engaging. From adjusting the brightness and contrast to fine-tuning the colors and saturation, every small tweak can make a significant difference in the final result.
But it doesn’t stop there. Post-processing also allows you to add a personal touch to your videos, giving them a unique style and flair. Through the use of filters, effects, and transitions, you can create a visual narrative that resonates with your audience. Whether you prefer a vintage look, a cinematic feel, or a vibrant and energetic vibe, the possibilities are endless when it comes to expressing your creativity through post-processing.
Understanding the Basics of Video Editing
Exploring the fundamentals of video editing is essential for creating captivating and professional-looking videos. By gaining a solid understanding of the basic concepts and techniques involved, you can enhance the overall quality and impact of your footage.
1. Storyboarding: Before diving into the editing process, it’s crucial to plan and organize your video content. Storyboarding allows you to visualize the sequence of shots and determine the flow of your video, ensuring a coherent and engaging narrative.
2. Trimming and Cutting: One of the primary tasks in video editing is removing unnecessary footage and refining the timing of your shots. By trimming and cutting segments, you can eliminate distractions and maintain a concise and focused storyline.
3. Transitions: Smooth transitions between scenes or shots can greatly enhance the visual appeal of your video. Experiment with various transition effects, such as fades, dissolves, or wipes, to create seamless and visually pleasing connections between different parts of your footage.
4. Color Correction: Adjusting the colors and tones in your video can significantly impact its overall mood and atmosphere. Use color correction tools to enhance the visual aesthetics, correct any imbalances, and create a consistent look throughout your footage.
5. Audio Editing: Sound plays a crucial role in video editing. Pay attention to the audio quality, remove background noise, and adjust the volume levels to ensure clear and balanced sound. Additionally, consider adding background music or voiceovers to enhance the overall impact of your video.
6. Effects and Filters: Experimenting with effects and filters can add a creative touch to your videos. Whether it’s adding a vintage look, applying a cinematic filter, or incorporating visual effects, these elements can help convey emotions and enhance the storytelling aspect of your footage.
7. Exporting and Sharing: Once you have completed the editing process, it’s time to export your video in the desired format and resolution. Consider the platform or medium where you intend to share your video and adjust the settings accordingly to ensure optimal playback quality.
By familiarizing yourself with these basic principles of video editing, you can elevate the quality of your footage and create videos that truly stand out. Remember to practice and experiment with different techniques to develop your own unique style and storytelling approach.
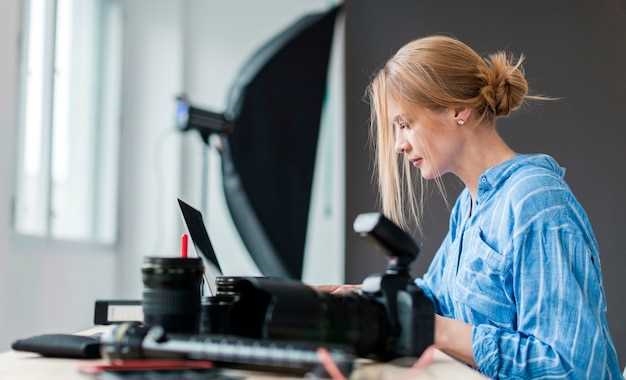
Choosing the Right Software for Editing SJCAM Footage
Enhancing the visual quality of your SJCAM footage is essential to create captivating videos that leave a lasting impression on your audience. To achieve this, selecting the appropriate software for editing your footage is crucial. The right software can provide you with the necessary tools and features to transform your raw footage into stunning videos.
Consider Your Editing Needs
When choosing software for editing SJCAM footage, it is important to consider your specific editing needs. Determine the level of complexity you require in terms of editing capabilities. Some software options offer basic editing functions, such as trimming and merging clips, while others provide advanced features like color grading and special effects. Assess your editing goals and choose software that aligns with your requirements.
Compatibility and User-Friendliness

Another factor to consider is the compatibility of the software with your operating system. Ensure that the software you choose is compatible with your computer or device to avoid any compatibility issues. Additionally, consider the user-friendliness of the software. Look for intuitive interfaces and easy-to-navigate menus that will streamline your editing process and save you time.
Furthermore, it is beneficial to explore software that offers a wide range of file format support. SJCAM cameras often capture footage in various formats, so having software that can handle these formats seamlessly will prevent any compatibility issues during the editing process.
Lastly, take into account the availability of technical support and updates for the software. Opt for software that provides reliable customer support and regular updates to ensure a smooth editing experience and access to the latest features.
By carefully considering your editing needs, compatibility, user-friendliness, and support options, you can choose the right software for editing your SJCAM footage. This will enable you to unlock the full potential of your footage and create visually stunning videos that stand out from the crowd.
Enhancing Colors and Contrast for a Vibrant Look
Creating visually stunning videos is all about capturing the viewer’s attention and immersing them in a vibrant visual experience. One way to achieve this is by enhancing the colors and contrast in your footage. By making subtle adjustments to the color saturation, brightness, and contrast levels, you can bring out the true vibrancy of your videos.
1. Adjusting Color Saturation
Color saturation refers to the intensity of colors in your footage. Increasing the saturation can make the colors appear more vibrant and eye-catching. However, it’s important to strike a balance and avoid over-saturating the colors, as it can result in an unnatural and artificial look. Experiment with different saturation levels to find the perfect balance that enhances the colors without going overboard.
2. Enhancing Brightness and Contrast
Brightness and contrast play a crucial role in making your videos visually appealing. Increasing the brightness can make the footage appear more lively and vibrant, while adjusting the contrast can add depth and dimension to the visuals. Be careful not to overdo it, as excessive brightness or contrast adjustments can lead to loss of details or a washed-out look. Aim for a natural and balanced enhancement that brings out the best in your footage.
- Use color grading tools or software to fine-tune the colors and contrast levels.
- Experiment with different color presets or create your own custom color profiles.
- Consider the mood and theme of your video when making color and contrast adjustments.
- Pay attention to skin tones and ensure they remain natural and flattering.
- Regularly preview your changes on different devices and screens to ensure consistency.
By enhancing the colors and contrast in your SJCAM footage, you can transform ordinary videos into visually captivating masterpieces. Remember to experiment, find your own style, and always strive for a natural and vibrant look that enhances the overall viewing experience.
Applying Filters and Effects to Add Style and Creativity
Enhancing your SJCAM footage with filters and effects can transform your videos, adding a unique style and creative flair. By applying various filters and effects, you can enhance the visual appeal of your footage, making it stand out from the crowd.
1. Experiment with Color Filters
Color filters can completely change the mood and atmosphere of your videos. Try using warm filters to create a cozy and nostalgic feel, or cool filters to add a sense of calmness and tranquility. Play around with different color filters to find the one that best suits the tone and theme of your video.
2. Add Dynamic Effects
Dynamic effects can bring your footage to life and make it more engaging for viewers. Experiment with effects like slow motion, time-lapse, or reverse to add a sense of drama and excitement. These effects can help highlight specific moments or actions, making your videos more visually captivating.
3. Apply Creative Transitions
Transitions can smooth the flow between different scenes or shots in your video. Instead of using standard cuts, try applying creative transitions like fades, wipes, or zooms. These transitions can add a professional touch to your videos and make them more visually appealing.
4. Experiment with Text and Graphics
Adding text and graphics can enhance the storytelling aspect of your videos. Use text overlays to provide context or captions, and incorporate graphics to illustrate key points or emphasize certain elements. Be creative with fonts, colors, and placement to make your text and graphics visually appealing and cohesive with the overall style of your video.
5. Use Filters and Effects in Moderation

While filters and effects can add style and creativity to your videos, it’s important to use them in moderation. Overusing filters and effects can distract viewers from the content and make your videos appear amateurish. Remember to strike a balance between enhancing your footage and maintaining its authenticity.
By applying filters and effects to your SJCAM footage, you can elevate the visual quality of your videos and make them stand out. Experiment with different options, but always keep in mind the overall theme and message of your video. With a touch of creativity and the right application of filters and effects, your videos will captivate and impress your audience.
Removing Unwanted Noise and Distortions for a Professional Finish
In the pursuit of creating high-quality videos, it is essential to address the issue of unwanted noise and distortions that can detract from the overall professional finish. These imperfections can arise from various sources, such as background noise, wind interference, or camera vibrations, and can significantly impact the viewer’s experience. This section will explore effective techniques and tools to remove unwanted noise and distortions, ensuring a polished and professional result.
1. Noise Reduction Tools
One of the primary methods to tackle unwanted noise is by utilizing noise reduction tools. These software applications or plugins are designed to analyze the audio track and identify and suppress background noise while preserving the desired audio. Some popular noise reduction tools include Adobe Audition, iZotope RX, and Audacity. Experimenting with different tools and settings can help achieve the desired level of noise reduction without compromising the overall audio quality.
2. Equalization and Filtering
Another effective approach to minimize unwanted noise and distortions is through equalization and filtering techniques. Equalization allows you to adjust the frequency response of the audio, enabling you to boost or attenuate specific frequencies. By identifying and reducing frequencies that contribute to noise or distortion, you can significantly improve the overall audio quality. Additionally, applying filters such as high-pass filters can help eliminate low-frequency rumble or wind noise, further enhancing the clarity of the audio.
3. Audio Restoration Techniques
In cases where the footage contains significant noise or distortions, advanced audio restoration techniques can be employed. These techniques involve using specialized software to repair and enhance the audio quality. For example, spectral editing allows you to visualize and manipulate the audio frequencies, enabling precise removal of unwanted noise. Additionally, techniques like audio interpolation can help recreate missing or distorted audio segments, resulting in a more seamless and professional audio experience.
- Experiment with different noise reduction tools to find the one that suits your needs.
- Adjust the equalization settings to target and reduce frequencies that contribute to noise or distortion.
- Apply filters like high-pass filters to eliminate low-frequency noise.
- Consider using advanced audio restoration techniques for more challenging cases.
- Regularly monitor and test the audio quality throughout the editing process to ensure optimal results.
By implementing these techniques and tools, you can effectively remove unwanted noise and distortions from your SJCAM footage, resulting in a professional finish that captivates your audience. Remember to experiment, fine-tune, and regularly evaluate the audio quality to achieve the best possible results.
Exporting and Sharing Your Edited SJCAM Videos
Once you have finished editing and enhancing your footage captured with your SJCAM camera, it’s time to export and share your videos with the world. This section will guide you through the process of exporting your edited videos and provide tips on how to effectively share them.
Exporting your edited SJCAM videos involves converting them into a format that is compatible with various devices and platforms. This allows you to share your videos on social media, video sharing platforms, or even burn them onto DVDs for offline viewing.
One important consideration when exporting your videos is choosing the right file format and resolution. Different platforms and devices have specific requirements, so it’s essential to select the appropriate settings to ensure optimal playback quality. Additionally, you may want to consider compressing your videos to reduce file size without compromising too much on quality.
Another aspect to consider is adding metadata to your exported videos. Metadata includes information such as the title, description, and tags, which can help improve the discoverability of your videos on search engines and video platforms. Take the time to provide accurate and relevant metadata to attract viewers and increase the visibility of your content.
Once you have exported your edited SJCAM videos, it’s time to share them with your audience. Social media platforms like YouTube, Facebook, and Instagram are popular choices for sharing videos. You can upload your videos directly to these platforms or use third-party tools to schedule and automate your sharing process.
Additionally, consider creating a dedicated website or blog to showcase your videos. This allows you to have full control over the presentation and organization of your content. You can embed your videos on your website and provide additional information or context to enhance the viewing experience for your audience.
Remember to engage with your viewers by responding to comments and feedback. Building a community around your videos can help increase your reach and attract more viewers. Encourage your audience to share your videos with their networks to further expand your reach.
In conclusion, exporting and sharing your edited SJCAM videos is an essential step in getting your content out into the world. By choosing the right file format, adding metadata, and utilizing various platforms and tools, you can effectively share your videos and reach a wider audience.